
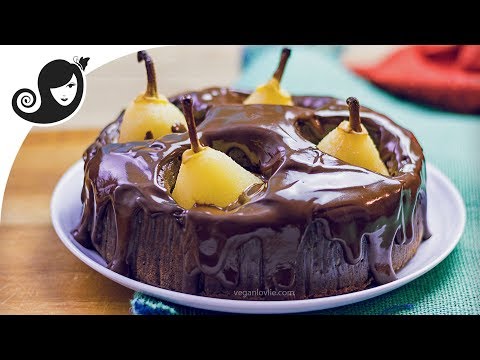
Hi friends, I think chocolate and pear lovers should find much joy in today’s recipe which is a deliciously moist and mellow chocolate cake with whole sweet juicy California Bartlett pears and glazed with a beautiful chocolate ganache And due to popular demand, this cake is made in a pressure cooker which makes it an ideal cake for the summer months as you don’t have to turn the oven on
If you don’t have a pressure cooker though, this cake can be steamed in a regular pot I will also include some baking instructions Thank you to California pears for sponsoring this video today This allows us to keep making delicious recipe videos to share with you California Bartlett pears are the ideal variety of pear for this cake
If I am eating Bartett pears raw as a healthy snack, I love them semi-ripe But for this recipe, we need them fully ripe They are golden yellow when at their peak ripeness, and among the sweetest and juiciest of all pears which is why I love them so much for dessert recipes In Canada, they are available for several weeks in July and August Pears contain a lot of antioxidants and are a good source of fibre, Vitamin C, potassium and folic acid
Bartlett pears have such a tender skin that it is not even necessary to remove it for baking However in this recipe, I do find that peeling the pears result in a much nicer texture inside the cake Also remove the bottom part of the pears Now, let’s make the cake As usual you will find the printable recipe along with some additional tips on our website
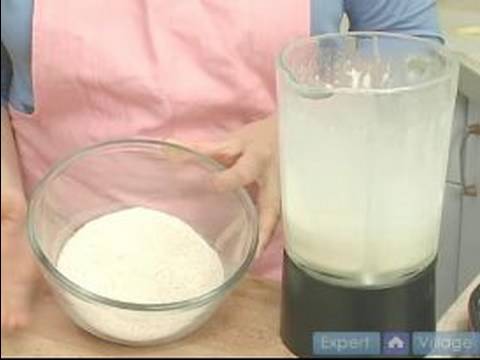
The link is in the description below In a measuring jug, place the non-dairy milk and the vinegar Leave this mixture to stand for a few minutes In the meantime, prepare the cake pan I am using an 18cm or 7-inch springform cake pan to fit in the pressure cooker
We will need a sort of lid to cover the pan in the pressure cooker or steamer so that the steam does not drip back on the cake and make it soggy You can use aluminium foil and crumple it around the pan if you wish but I am making the lid with parchment paper To do this, trace around the pan on parchment paper Then Fold the paper in half and again in half 2-3 times with the circle matching By the way, if you are baking this cake, you don't need the lid
So, you may skip ahead Check the timestamps in the description Trim the folded paper 6 – 8 cm outside the traced circle so that you have a larger circle Now snip into the circle from the edge towards the centre and stopping at the inner circle at regular intervals all around Fold the snipped pieces of paper along the inner circle which is the size of pan
Staple each of the folded pieces together to make a straight edge around the circle And the lid is done We will need 2 pieces of string, each about 4 times the width of the pan This will be tied around the pan and serve as a handle which will make it easy to lower the pan in the pressure cooker and then later remove it Line the bottom and side of the pan with parchment paper
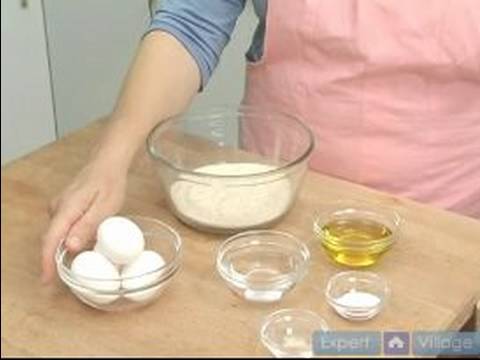
For the side, I’ve stapled the paper where the edges meet but just at the top I suggest making the height slightly taller than the pan in case the cake rises more If your mould is quite tall, then you may leave the side unlined Our pan is ready so let’s continue with the recipe In a large mixing bowl, mix all the dry ingredients together
I am using whole spelt flour You may also use whole wheat flour or half whole and half all-purpose or plain flour Add the baking powder, baking soda, cocoa powder, a pinch of salt, cornstarch and cinnamon Whisk and mix well Set this mixture aside for the moment
Back to the measuring jug, where the milk and vinegar had the time to turn into buttermilk by now, add the rest of the wet ingredients Make sure the sugar is well dissolved before adding the other ingredients The vanilla extract and melted coconut oil You may also use sunflower or olive oil Stir and mix well
Make a well in the centre of the dry ingredients and pour the wet ingredients Mix to incorporate all the ingredients into a smooth batter without any lumps Do not whisk or over-mix this mixture though, or it will result in a somewhat dense cake texture Pour the batter into the cake pan You can see that I’ve placed both pieces of string under the pan, with the mid-point of the strings matching the centre of the pan
Spread the batter around evenly Insert the pears into the batter until they are almost touching the bottom but leave a little bit of batter underneath them Cover the pan with the parchment paper 'lid' that we made before and tie the strings around the pan to make a handle You can separate the strings to get a bit more balance In the pressure cooker, place 2 cups of water as well as a steamer rack
For stove top pressure cookers, add one extra cup of water Gently lower the cake tin onto the rack and leave the string in there Close the pressure cooker Turn the valve to the closed position Then set the settings on manual for 38 minutes on maximum pressure
Press the start button and let the pressure cooker do its magic For stove top pressure cookers, steam for 38 minutes as from the first whistle You can also steam this cake in a regular pot for about 45 to 50 minutes In this case, keep adding water in the pot as needed If you want to bake this cake, bake in a preheated oven at 180C for 40 – 45 minutes
You don’t need to cover the cake if you are baking it After the time is up, let the pressure and steam go down naturally, ie do not quick release it Once it is 'safe to open' the pressure cooker, remove the cake tin and take off the parchment paper lid
Test for doneness by inserting a skewer in the middle of the cake away from the pears It should come out clean with just a few crumbs but no batter Allow the cake to cool completely before demoulding You can serve this cake just as it is now but I am going to add some frosting, a delightful chocolate ganache For the ganache, bring some water to a boil in a saucepan
Break the chocolate into a bowl I am using dark chocolate but any type will do Place the bowl on the saucepan When the chocolate starts to melt, stir a few times until all is melted and smooth Turn off the heat or remove the bowl from the saucepan and add the milk a little at a time while continuously stirring
You should get a smooth thick chocolate sauce with a dripping consistency but not too runny Drizzle or spread the chocolate ganache on the cake using a spoon or spatula You can smooth it out around the edge if you wish but I like the irregular drippings To serve make sure to cut half a pear with each slice of cake I hope you’ll try this recipe and tell us how you liked it
if you love poached pears and chocolate cake you’ll most certainly enjoy it It’s moist and tender with the juicy sweet California pears Don’t forget to grab some of these Bartletts on your next grocery trip; they’re only going to be in the stores for a few more weeks until end of August This cake will keep in the refrigerator for 3 – 4 days and it is even tastier the next day If you’ve enjoyed this recipe, give us a thumbs up and leave us a comment
Don’t forget to take some pictures if you try this recipe and tag us on Instagram Check our blog for the printable recipe and a few additional tips Please subscribe to the channel for more recipes and make sure to enable your notifications, it's the little bell icon, so that you don't miss any of our videos We share a few more recipes on our blog so make sure to subscribe to our newsletter too We'll email you every time we have a new recipe
We have a lot more deliciousness coming soon so stay tuned Love you all and see you very soon in our next video
HIGHLY RECOMMENDED

Kosher